How to setup Ghostboard

Setting up Ghostboard for your blog is very easy. If you need additional help, here is a guide for you!
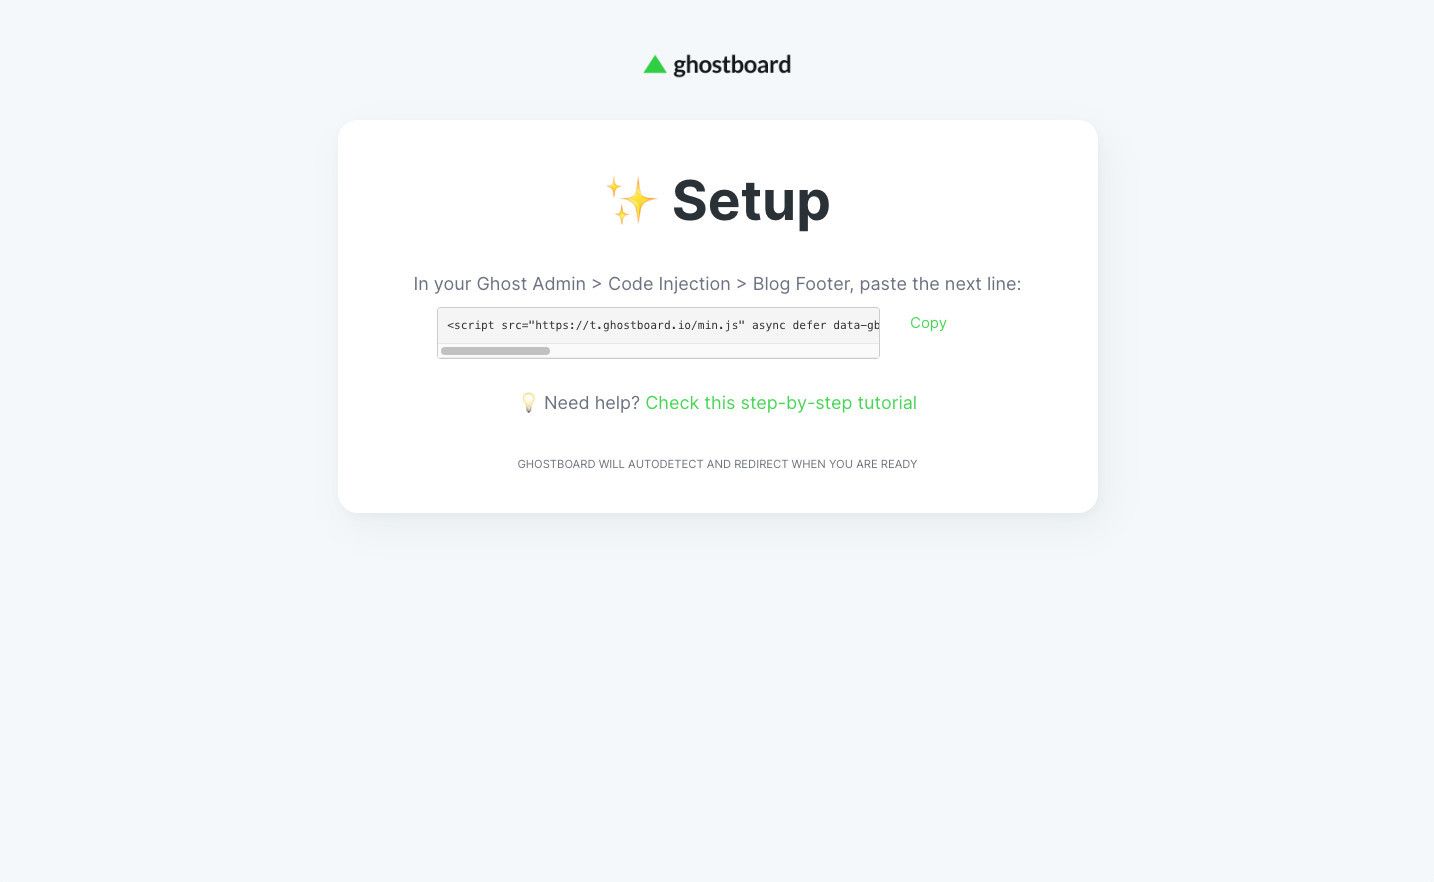
After completing your signup, you will be directed to the Setup page, which is always available at /setup if you haven't completed it yet. It looks like this:

Step 1: Copy your unique code line
On the Setup page (login required), you can manually copy the code line or click the Copy button to automatically copy it to your clipboard.
Step 2: Paste the code line into your blog
Sign in to your Ghost blog (login at yourblog.domain/ghost) and then navigate to the Code Injection section in the left menu:
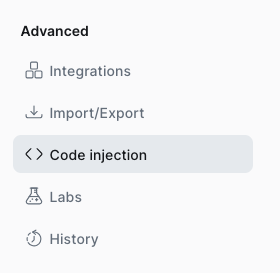
Click the Open link in the Code Injection section

Paste your code line into the Blog Footer section:
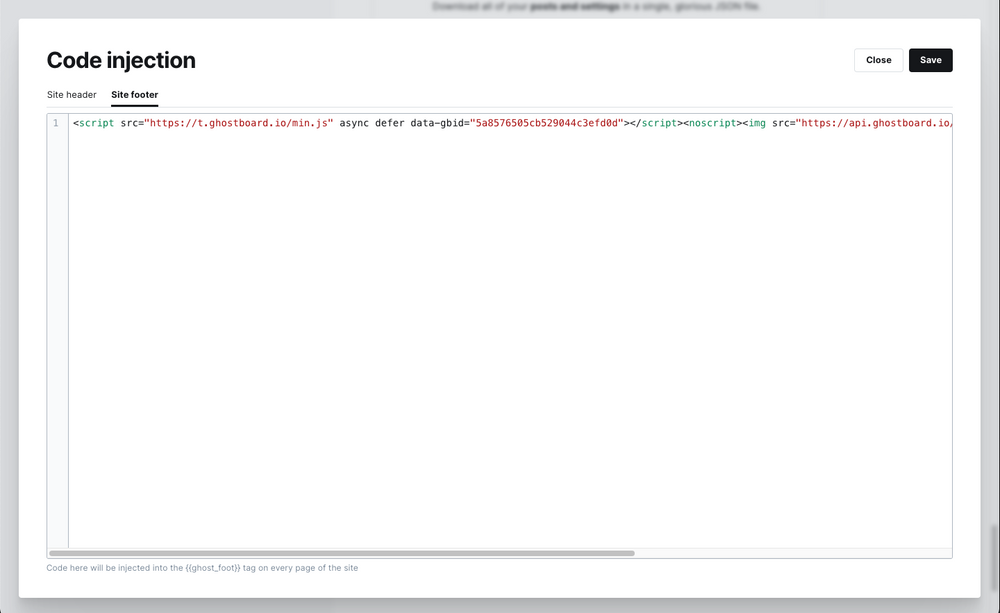
💡 If you already have some code, don't worry. Just paste the code at the beginning.
✅ Note: it will also work if you paste it in the Header section instead of Footer, but we recommend placing it in the Footer for better blog performance.
Save the changes and visit your blog. You will be able to see your dashboard. Welcome onboard! 🎉
Next step in the dashboard: API integration
For Ghost(Pro), Ghost 2.10 or the latest version
Starting with version 2.10, Ghost deprecated the public API and introduced the Content API.
- In your Ghost admin, click on
Integrationsin the left menu - Click green button
Add custom integrationfor Ghostboard - Copy the key value and paste it in Ghostboard
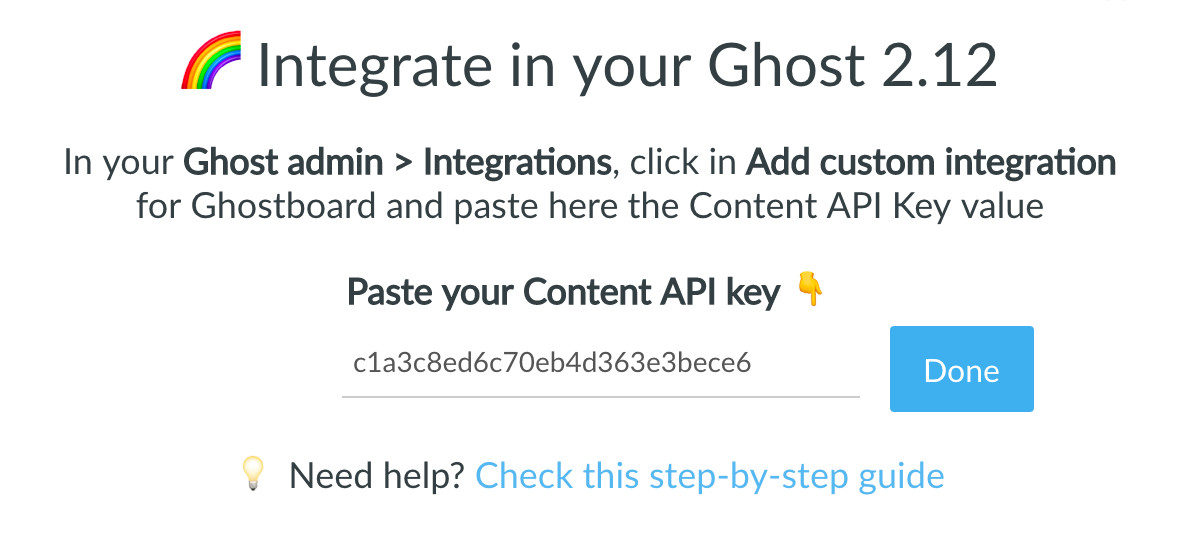
✨ Need help? Check this step-by-step guide with screenshots in How to integrate Ghostboard with Ghost Content API
If you are running Ghost 2.9 or older
- In your Ghost admin panel, navigate to
Labsin the left menu. - Scroll down to
Beta Features - Ensure that
Public APIhas a green checkmark ✅ If not, click on it to enable it.
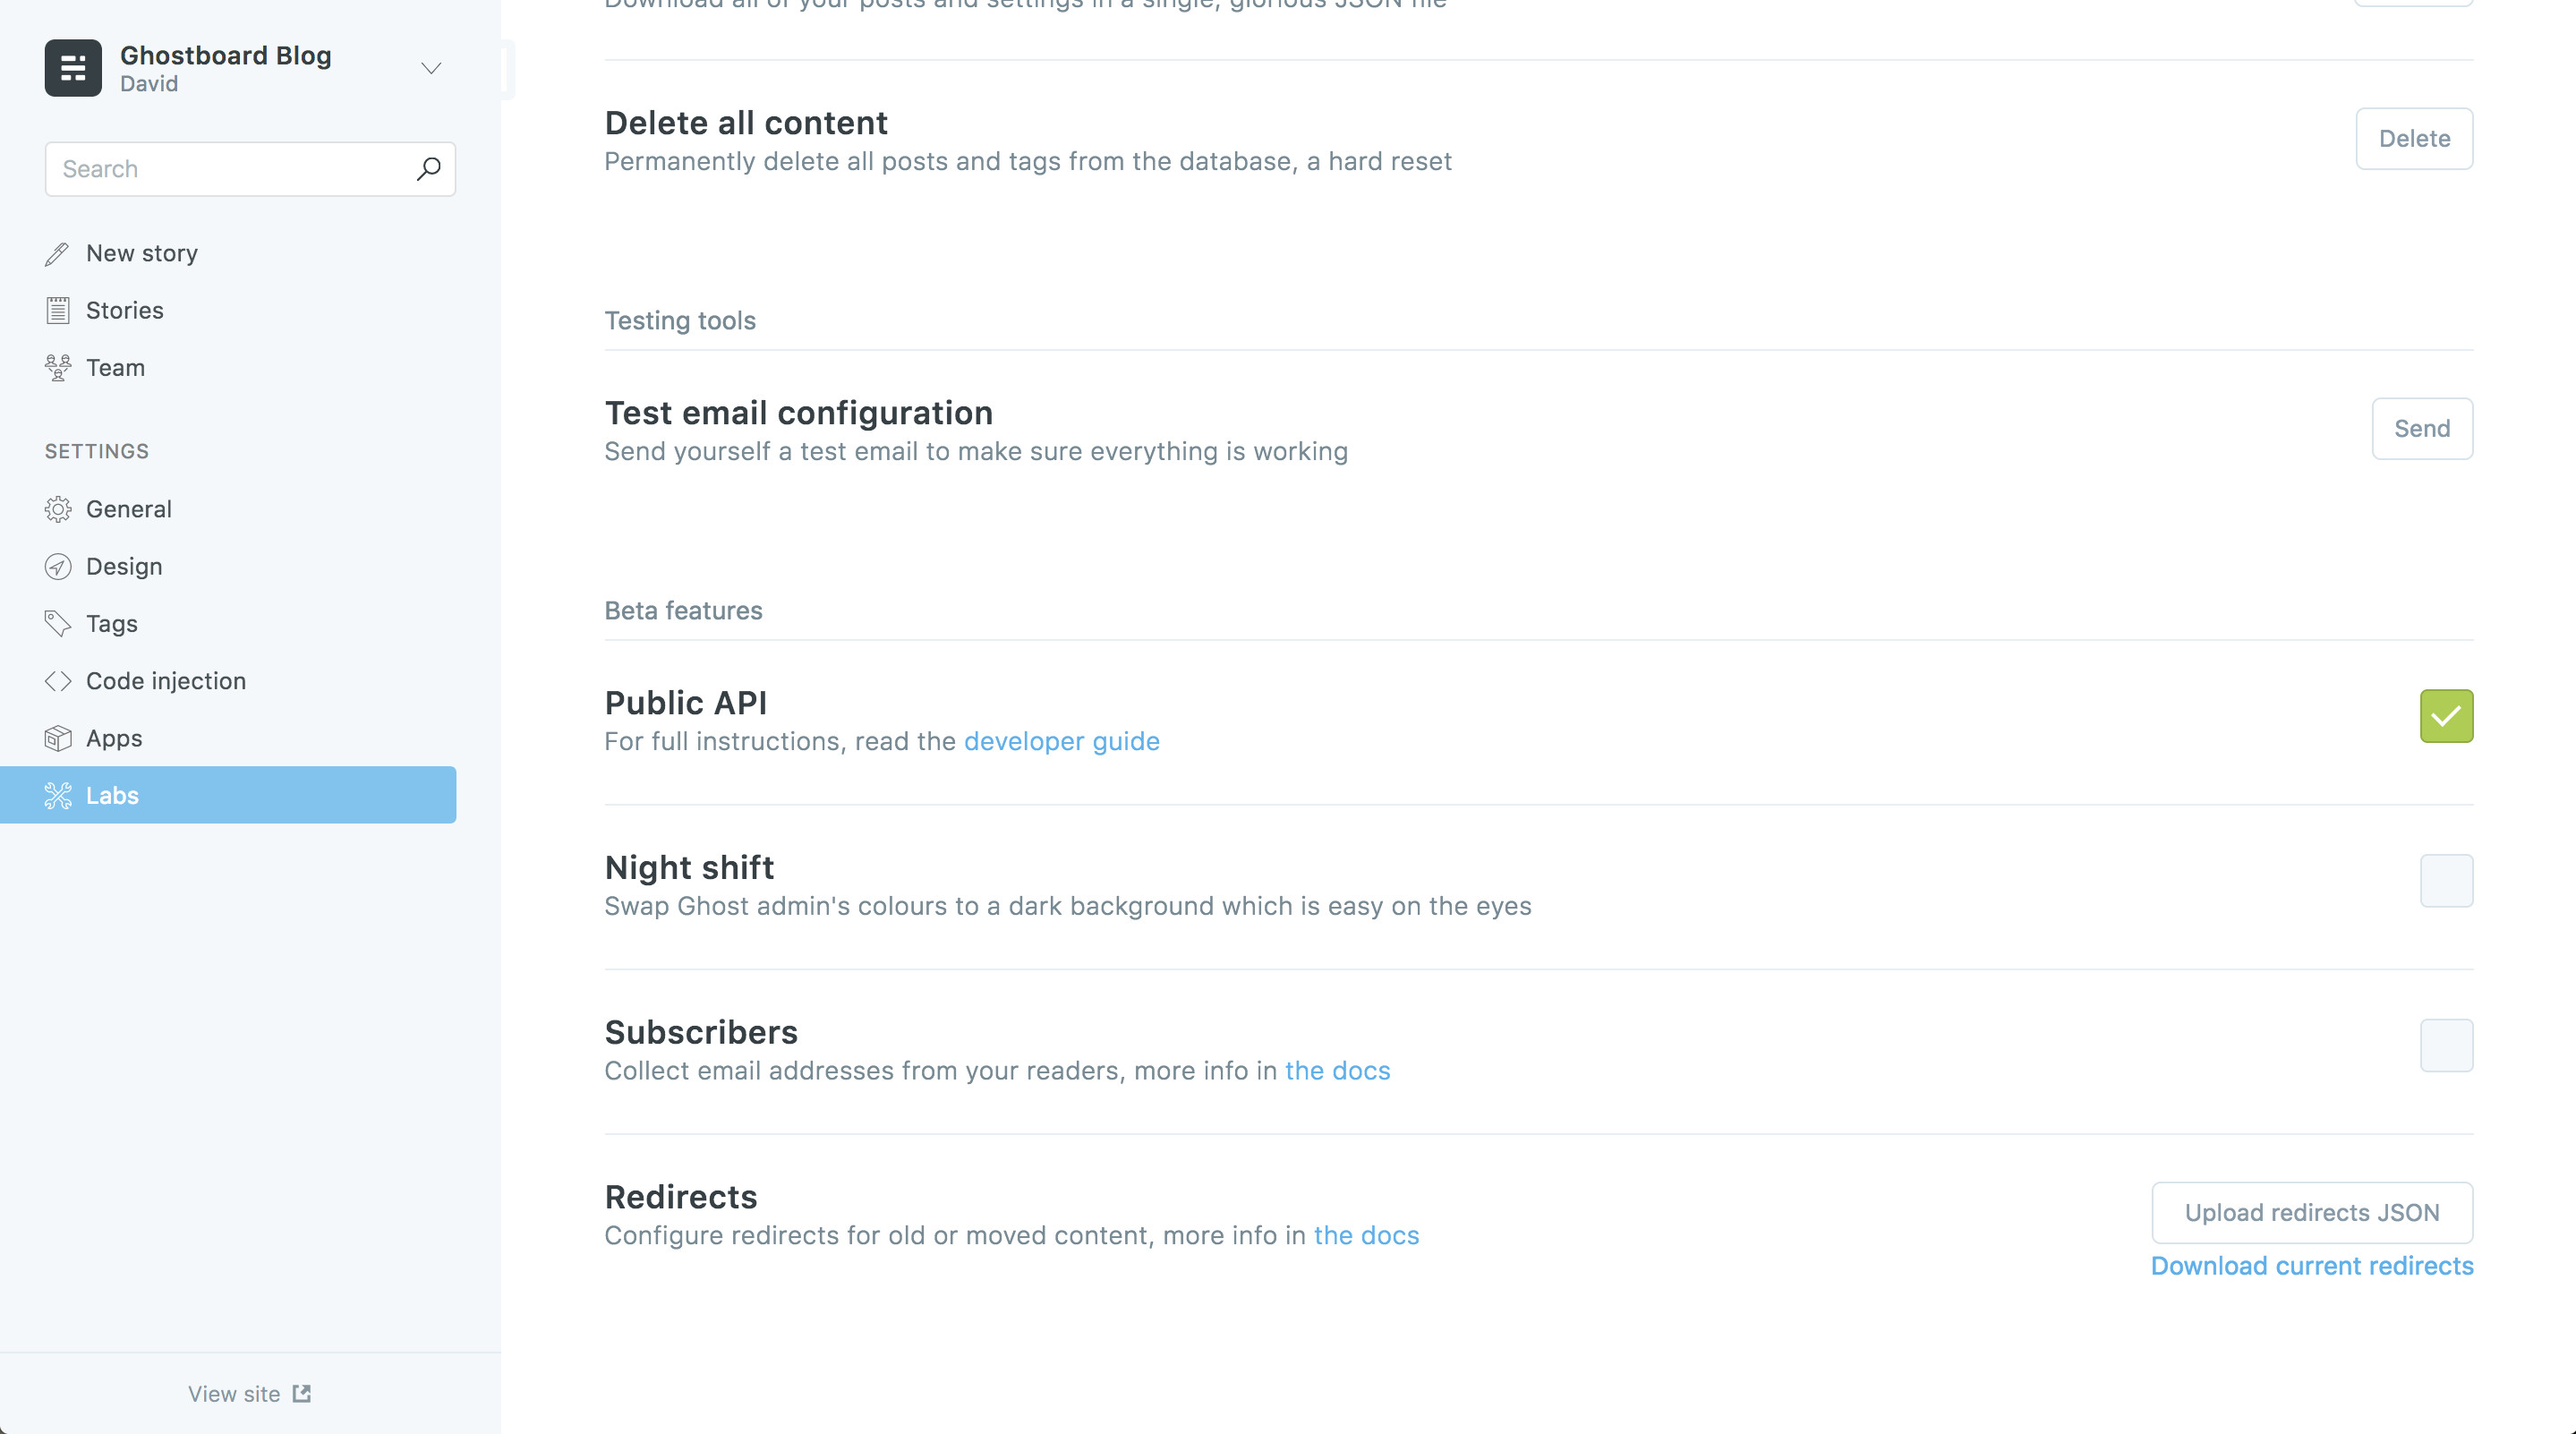
✅ Note: Public API is activated by default starting from Ghost version v1.0
Level up your Ghost blog 🚀
Start your free trial now and explore all Ghostboard features for free. No credit card is required.
We are here to assist you and answer any questions. Feel free to reach out to us via tweet or through your dashboard! 👋